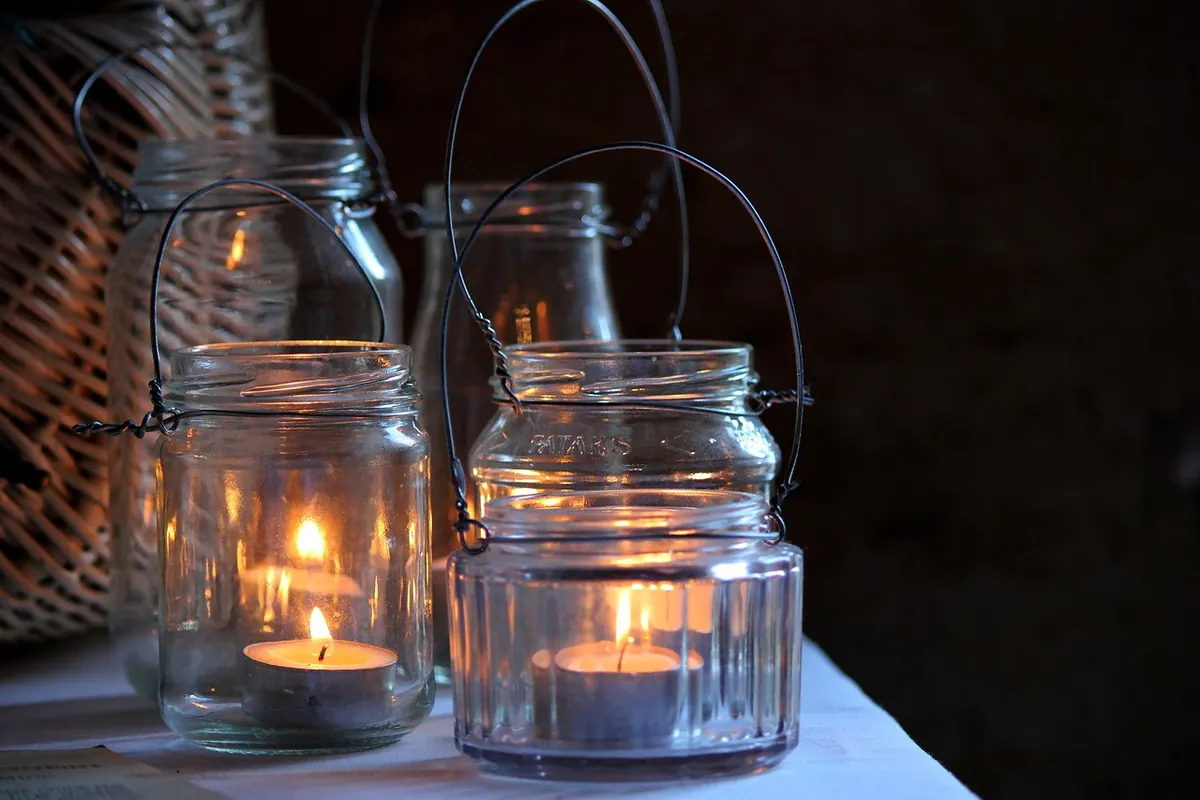
A quart jar, an inexpensive solar path light, and half an hour at the workbench. That is the whole recipe. The glass does quiet work here — it softens a bare LED into something closer to candlelight than a security flood, and it keeps rain off the electronics. The part that trips people up is the lid. Seal it carelessly and the first heavy dew finds its way in, corrodes the battery contacts, and the lantern quits by August. Do it properly and you can leave this thing on a step or a porch rail from spring through the first hard freeze.
Most of this is already in a drawer or a garage bin. The only item worth a trip to the store is the solar path light, and a basic one is fine. You are buying it for the electronics, not the stake.
Twist or pry the top puck off the stake. Inside you will find a small solar panel, a light sensor, a single LED, and a rechargeable AA — usually a 1.2-volt nickel-metal hydride cell. Before you go any further, peel off the plastic shipping tab that sits between the battery and its contact. It is the single most common reason a harvested light appears dead, and it is easy to miss once the module is buried in a jar.
Test the puck before you cut anything. Set it in direct sun for an hour, then cover the panel with your hand. The LED should come on within a few seconds.
If you want a brighter lantern or a warmer color temperature, skip the path light and start with a small solar panel, a matching rechargeable cell, and a driver board that handles the charge-and-switch duties. Match the panel's voltage to what the board expects, and keep the LED current within the board's rating. This version takes longer and costs more, but you get to choose a warm-white LED, which looks far better through glass than the cool-white emitters found in most bargain path lights.
Dry-fit the panel now. It should sit flush or sit slightly proud of the lid, with the glass face pointing up. If the puck is mounted on a plastic stalk, trim the stalk down with a craft knife until the puck sits flat.
Lay a thin, continuous bead of silicone around the underside of the panel, then press it into the hole from below. Wipe the squeeze-out with a wet finger — one smooth pass looks better than three nervous ones. Leave the light sensor clear; a smear of silicone over the sensor will have the lantern burning all day and dead by night.
Fit the rubber gasket or foam strip around the jar's rim so the lid seats against something soft. Metal on glass will not seal, and it chips the rim over time.
Now the important decision: keep the lid removable. Do not glue it to the jar. Batteries age, and you want to be able to swap one out in two minutes rather than rebuild the whole lantern. Let the silicone hold the panel to the lid and let the gasket do the work of sealing. Drop a desiccant packet inside before you close it up. Glass jars breathe with temperature swings, and that packet is what stops fog from forming on the inside of the glass on cool mornings.
Set the finished lantern outside for a full day of direct sun. That evening, watch it. If it glows, you are done. If it comes on at dusk and fades after a few hours, the battery simply needs more charging time before you judge it.
Placement matters more than most people expect. In the northern hemisphere, aim the panel south and give it five or six hours of unobstructed sun. A porch with a roof, a north-facing step, or a spot under a tree will leave the battery half-charged at best. Window glass cuts charging significantly, so a sunny windowsill indoors is not a substitute for real daylight.
Set the jar on a brick, a saucer, or a small paver rather than directly in soil. Standing water against the lid is the enemy. Expect roughly four to eight hours of glow from a typical path-light cell on a good charge; a larger battery or a more efficient LED stretches that.
Work through these in order before you assume the module is dead:
In cold weather, expect shorter runtimes. Nickel-metal hydride cells lose capacity as temperatures drop, so bring the lantern indoors during a hard freeze and it will last for years.
Frosted glass spray gives a softer, more even light than clear glass, and two light coats are plenty. A wrap of jute twine around the neck, a run of copper wire twisted into a handle, or a handful of glass pebbles in the bottom all change the character without touching the electronics. Three jars at different heights along a step look better than one, and they charge just as well.
Then leave it alone and let it work. Wipe the panel with a damp cloth once a month, refresh the battery every season or two, and bring it in before the deep cold. That is the entire maintenance list for a lantern that costs very little and asks nothing of you after dark.
Photo: Studiolarsen / Pixabay

A practical checklist for lakeside lantern releases: permits, biodegradable materials, written wind limits, launch...
Lumens, kelvins and CRI decide how bright a lantern feels, what color its light casts, and whether you can tell red...

Rust on an old lantern is usually surface damage, not a death sentence. Here's how to clean, polish and reseal one...


Bright ideas and beautiful lanterns for every space..
